Integrating NetSuite
Integrating NetSuite
In order to activate the NetSuite integration on your Blue Onion account you will need to:
- 1
- Create a Role with the specific permissions Blue Onion app needs.
- 2
- Associate a User to the new Role.
- 3
- Create an Integration to be used by Blue Onion app.
- 4
- Create an Access Token.
- 5
- Provide the Integration and Access Token credentials to Blue Onion app.
Creating a Saved Transaction Search
- Click on Lists > Search > Saved Searches > New

- Look for “Transaction” under “Search Types” and click it.

- On the “Saved Transaction Search” page fill “SEARCH_TITLE” will “blueonion_validation_search” and toggle “Public” and “Available as List View”. The search title needs to be exactly “blueonion_validation_search”.

- Under Criteria > Standard, add the filter “Main Line”. Select “Yes” on the pop up window, then click “Set”.

- Under Results
- Under Results > Columns, click “Remove All”.
- Still under Results > Columns, add the “Fields” “Internal ID”, “Last Modified” and Date.
- Select “Internal ID” as the “Sort By” column, and toggle “DESCENDING”.
- Click “Save” to save and exit.
Creating the Blue Onion Role
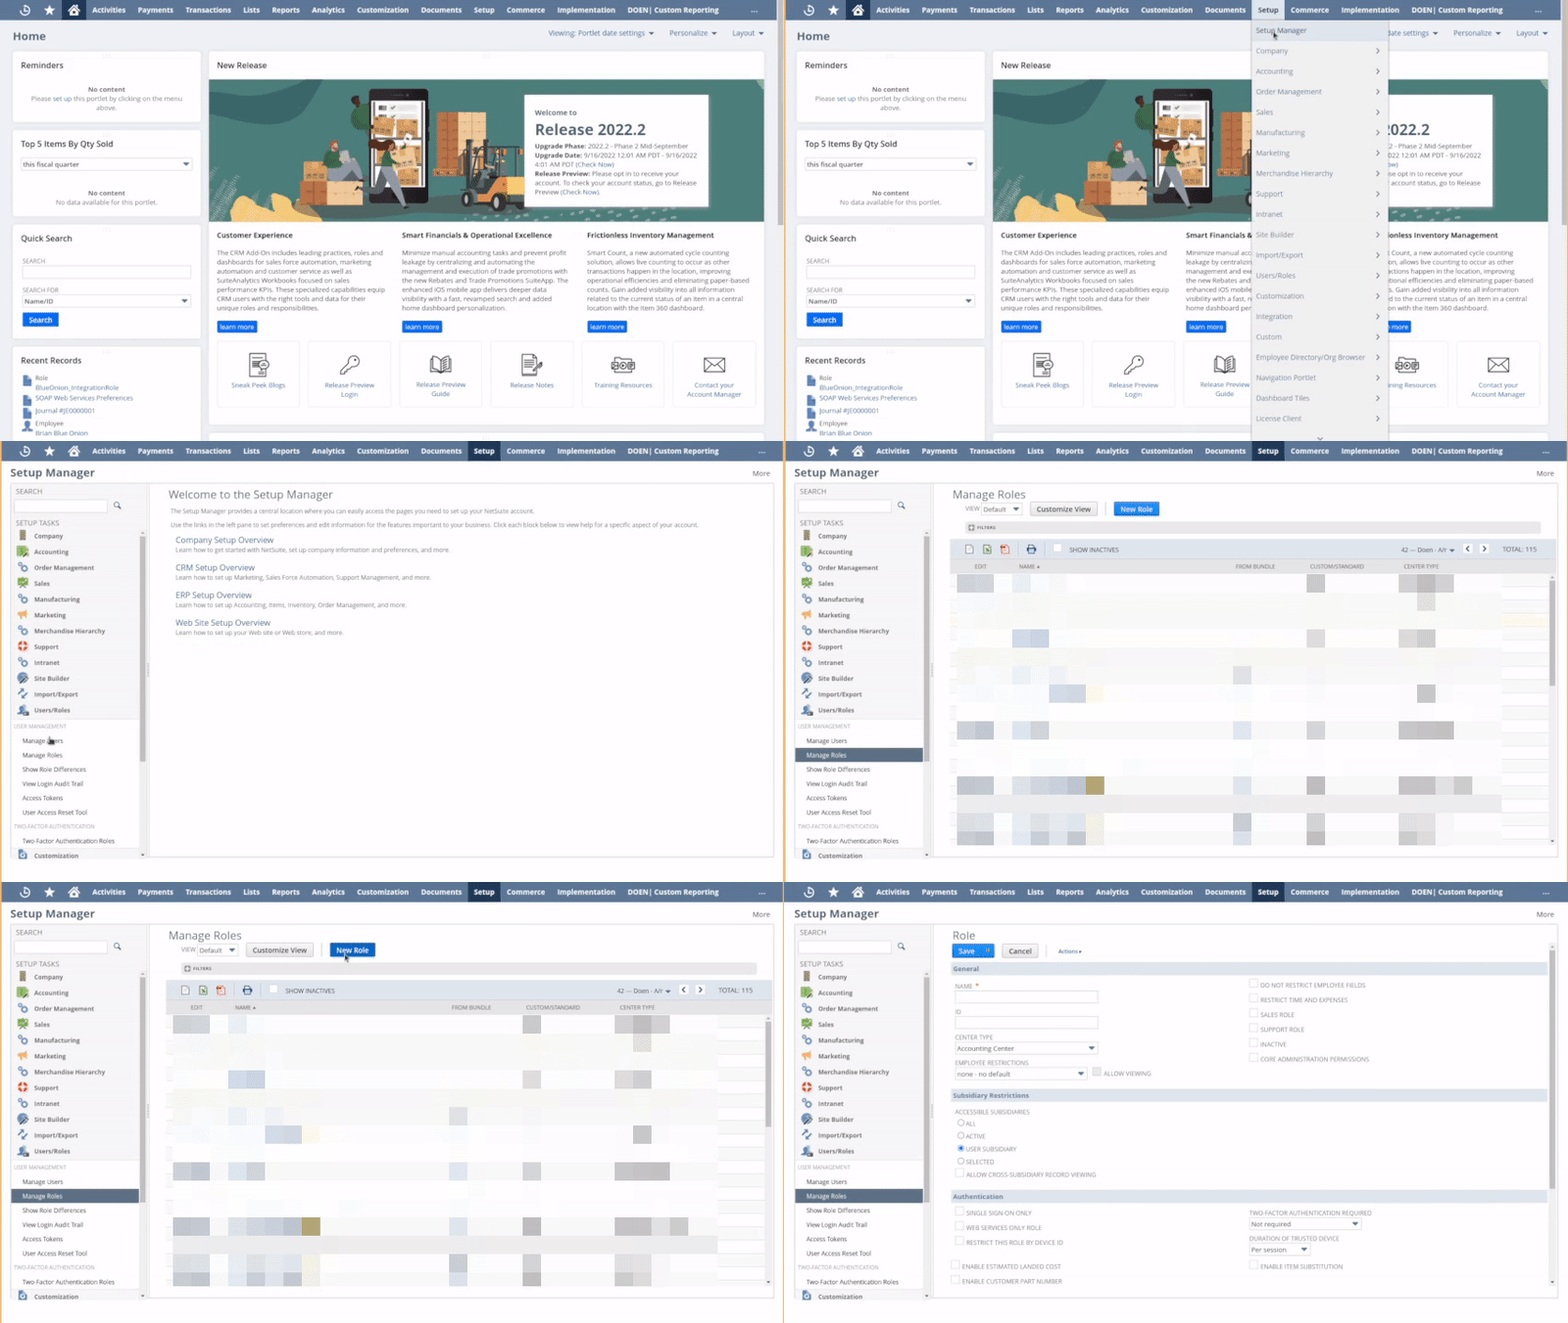
- Log in as the admin to the Control Panel.
- Click on Setup > Setup Manager.
- After Setup Manager loads, click on User/Roles > Manage Roles.
Click New Role.

- Set the field.
Leave the other General, Subsidiary Restrictions, and Authentication with the default selections - as show in the following picture.

- Tabs:
a. On the Transactions tab:

b. On the Reports tab:

c. On the Lists tab:

d. On the Setup tab:

e. on the Custom Record tab:

- Leave the remaining tabs with the default configuration.
- Click Save to create the Role.
Associating a User to the new Role
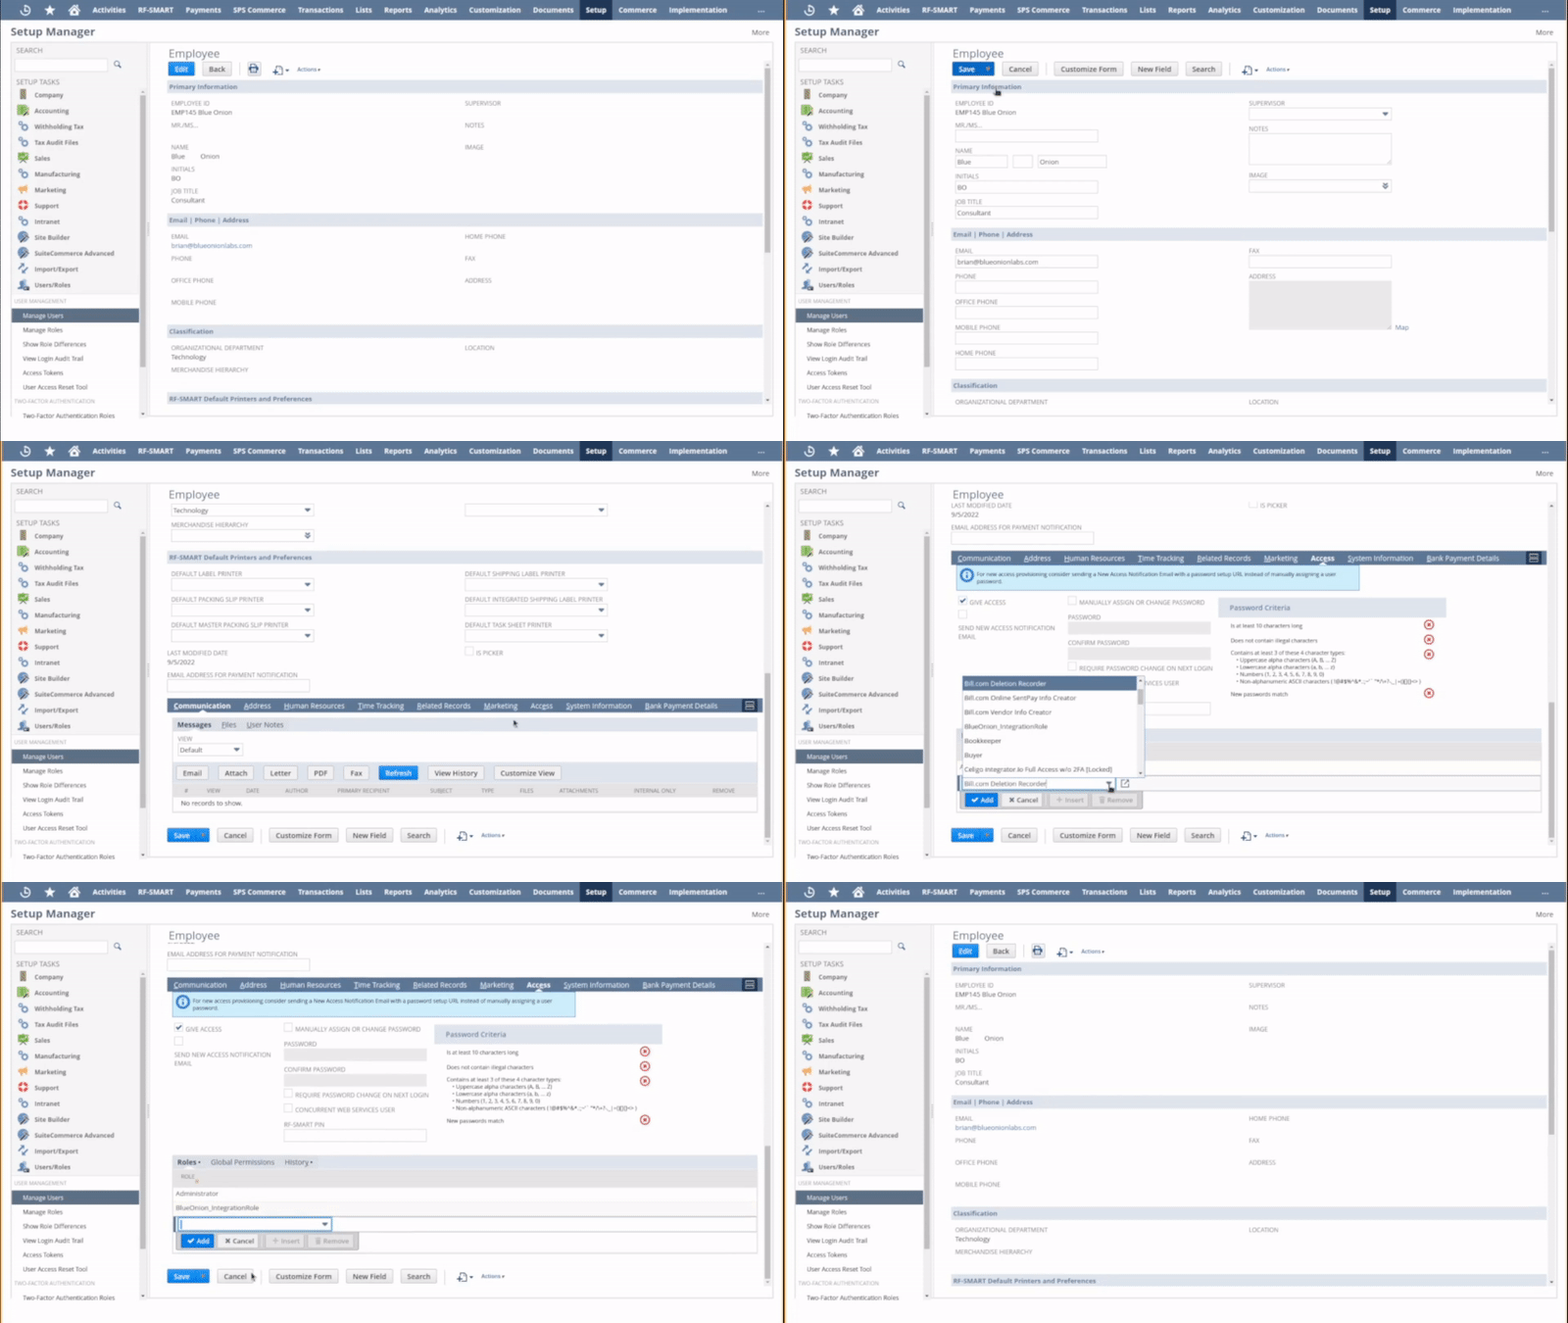
- In the Setup Manager page, click Users/Roles > Manage Users.
- Find the User you want to associate and click on its name.
- Click Edit on the left top corner of the page.
- Scroll down to the bottom of the page.
- Select the Access tab > Roles tab.
- Add the *BlueOnion_IntegrationRole *****to the list.
Click SAVE.

Creating Integration
- In the Setup Manager page, click Integration > Manage Integrations.
- Click NEW.
- Set the NAME field to BlueOnion_Integration.
- Under the Authentication > Token-based Authentication section, check TBA: ISSUETOKEN ENDPOINT and unselect TBA: AUTHORIZATION FLOW.
- Under the Authentication > OAuth 2.0, unselect AUTHORIZATION CODE GRANT.
- Leave the other fields with the default values. The configuration should look like the following:

- Click Save.
- Save the credentials displayed on the page. It is not possible to retrieve the credentials after leaving this page.

Generating an Access Token
- In the Setup Manager page, click User/Roles > Access Tokens.
- Click New Access Token.
- On the APPLICATION NAME field, select the name of the Integration previously created (*BlueOnion_Integration)*.
- On the USER field, select the User associated to the created Role.
- On the ROLE field, select the Role previously created.
- The TOKEN NAME field will be automatically filled based on the previous selections.
- Click Save.
Save the credentials displayed on the page. It is not possible to retrieve the credentials after leaving this page.

Providing Credentials to the Blue Onion App
- Navigate to the Company Information page by following the Setup > Setup Manager > Company menu and selecting Company Information.
Copy the Account ID as shown below and input as the NetSuite Account in the Blue Onion app.
